Even though it’s a simple task to rename a single file, renaming multiple files in bulk can prove to be quite tricky at times. However, there are a couple of solutions to get this job done pretty easily in
Windows 10, besides the usual practice of opting for third-party apps. Let’s jump right into the solutions then.
Before we dive into the native renaming solutions offered by Windows 10, consider using a third-party app to rename files. The benefits are that the job gets done pretty quickly and is spot on. And you don’t need to learn any new commands to perform this task. It’s all in a neatly laid out software program.
EFR is verified by Verisign
Solutions
Solution 1: Renaming with Windows Explorer
Windows itself provides a convenient way to rename files in bulk. Even though this method isn’t that sophisticated, it is still pretty handy for getting quick results. It’s highly recommended for naming files in the numerical order.
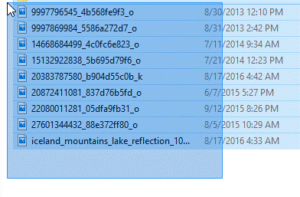
- Select the files which you wish to rename.
- Right-click in the highlighted area to bring up the context menu and select Rename.
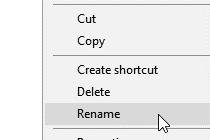
Select rename from the context menu - Give your desired name to a file.
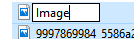
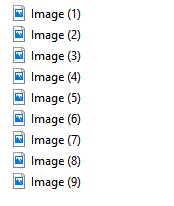
Enter a new name for the file - The final outcome will turn out to be as per the following screenshot.
Solution 2: Rename Files with Command Prompt
This method is the same as the solution 1, but it will make the work easy when it comes to renaming files of specified extension. Also unlike the previous method, this method is somewhat automated and flexible. With the given script it can be enhanced further.
- Click the start button.

- Search for Notepad and open it from the Search Results.

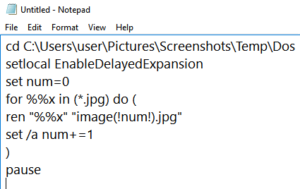
Open Notepad - Use the following script in the notepad:
cd C:\Users\user\Pictures\Screenshots\Temp\Dossetlocal EnableDelayedExpansionset num=0for %%x in (*.jpg) do (ren “%%x” “image(!num!).jpg”
set /a num+=1
)
pause
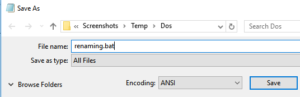
- Save it as renaming.bat, set the File Type as All Files and Encoding should be ANSI unless you use non-English characters.
- Execute the script by double clicking on it.
How to Modify the Script in The Solution 2?
The following script is customizable depending on your requirements. Only make changes on the highlighted segments, whilst retaining the rest without making any changes.
cd C:\Users\user\Pictures\Screenshots\Temp\Dos
setlocal EnableDelayedExpansion
set num=0
for %%x in (*.jpg) do (
ren “%%x” “image(!num!).jpg”
set /a num+=1
)
pause
The “*.jpg” will define the type of files being renamed as .jpg files. Hence, this script will iterate all the .jpg files and rename it. If you want another file type, replace “jpg” with the corresponding extension.
- The following highlighted segment represents the path where the files reside. If your files are located in another directory, then use that path instead of the given path. When using certain paths, such as “C:\Files\Program Files“, it’s important to enclose the path by “” (double quotation marks), otherwise Command Prompt will throw an error.
“C:\Users\user\Pictures\Screenshots\Temp\Dos” - The following segment represents the file’s / files’ extension and it is only that particular extension mentioned in this string that will be scanned foir renaming purposes.
*.jpg - In default, the images are renamed to image (1).jpg format, if you want to change it to something else such as, myimage_.(1).jpg or myimage_1.jpg, etc, then change the format in the ren command as following.
“image.!num!.jpg” -> image.1.jpg
“my_image_!num!.jpg” -> my_image_1.jpg “documents_!num!.docx” -> documents_1.docx