Sending photos to another device had always been a tedious work in the past, but with the introduction of Windows 10 and its latest updates, it became as simple as a couple of taps on the screen. It’s a common belief that to transfer files to the PC from an iPhone, the computer requires iTunes to be installed, but it’s no longer true with the advancement of the Windows 10 operating system.
This guide demonstrates how to transfer photos from an iPhone to Windows 10 over a WiFi connection. Furthermore, after transferring the photos it also demonstrates how to weed out duplicate photos from the PC. Even though it’s better to eradicate duplicate photos from the iPhone before transferring them to the computer, it’s best to perform this job on the PC as it’s a lot easier to do so on the PC.
Solution
This guide assumes the user has an up-to-date version of Windows 10 installed on their computer. Also, they must have installed PictureEcho on their computer, which will be used to take care of the junk photos. PictureEcho is required for removing duplicate photos from the PC once all the photos have been transferred, and Photos Companion is used to transfer photos to the PC over the Wi-Fi.
- Launch the Photos app, locate the three horizontal dotted line button and click Settings.

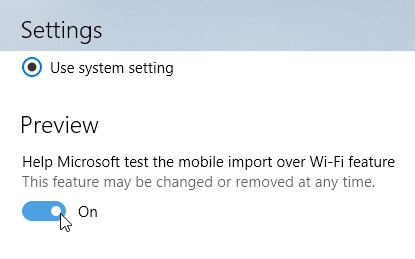
- In the Settings window, scroll down all the way down, and locate Preview and turn it on. Note that this option is only available in the latest version of Photos app.
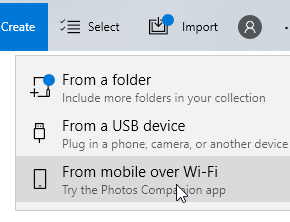
Turning on the Preview feature - Back to the Photos app, click Import, and select From mobile over Wi-Fi.
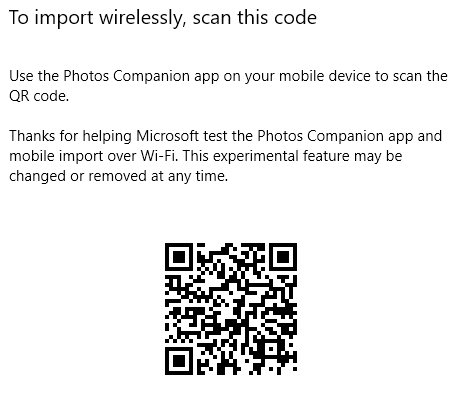
- Upon clicking the option we just mentioned, a new window will be opened through which Photos Companion can be downloaded to the iPhone.
- After downloading the app to the phone, launch it and click the Send Photos button. Grant the requisite permission to the app when prompted for and then finally select the photos you want to send by tapping on the screen and clicking Send to do the needful.
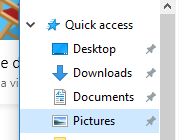
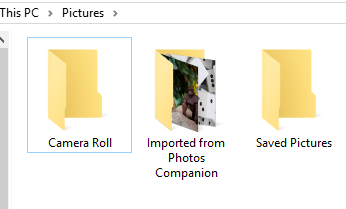
- In the PC, navigate to Pictures | Imported from Photos Companion to locate the photos you just transferred.
- Now launch PictureEcho and then add the Imported from Photos Companion folder in the Step 1 section to scan it for duplicate photos.
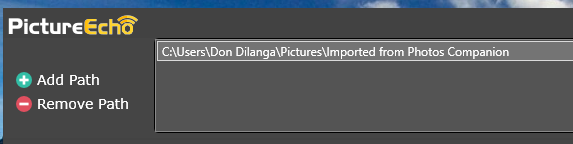
Adding the target folder to be scanned for duplicate photos - In the next step, select Similar Match to compare visually similar photos from the selected folder, or Exact Match if you want to scan for duplicate photos. Also, select the Show preview checkbox, and finally click Start Search to initiate the scan. The scan might take a while depending on the performance of the computer, and the number of photos to be scanned.

- Once the scan is over, the results will be laid out in the PictureEcho user interface. Simply click the Select Duplicates button to select an option of your choice. It will highlight in green the photos that will be deleted/ moved to a folder as a result of your choice in the final step.
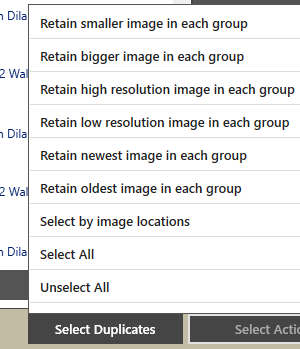
Choose which kind of files you want to retain - Finally, select Select Action to and make your choice. PictureEcho will spring into action and do the needful within seconds, ridding you of all unnecessary similar/ duplicate photos from your iPhone photos’ collection.
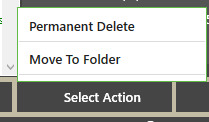
Choose between backing up the duplicates or permanently getting rid of them