Moving files from one folder to another is a simple and straightforward task, isn’t it? But there are times when both the source and destination folders contain the same files with the similar names. It creates confusion about which files to rename, overwrite, or keep. This article will discuss several methods available to choose from when that happens.
Method 1. Using File Move Function in Windows
promptAre you trying to move files using the keyboard shortcuts or the “Move to Folder” feature in Windows? In so doing, the File Move function in Windows might display a dialog “Replace or Skip Files” with different options:

Replace the files in the destination:
Use this option if you wish to replace the files in the destination directory with files in the source directory. Your files will be overwritten. Do not select this option if you want to keep the files from the destination directory.
Skip these files:
Use this option to skip files with the same name, and don’t overwrite them.
Let me decide for each file:
Use this option to decide what to do with each file in the queue.
When you click on Let me decide for each file, a new prompt appears with two columns and file previews. You will be able to check individual files one-by-one to keep them. You may also use the top-most checkbox to check all files inside a folder. To skip files with the same data and size, check the box named Skip files with the same date and size. Finally, click Continue.

Method 2: Using Easy File Renamer
Easy File Renamer (EFR) is a fast and lightweight tool to batch rename your files and edit MP3 music tags.
One of the core features of EFR is that it supports batch moving and batch copying of your files with no chances of errors. You may use the Mover to batch move files/ folders from one location to another. Similarly, you may use the Copier to batch copy files/ folders from one place to another.

Name Collision Rules:
What happens when one or more files from the source and destination folders contain the same files? Use the Name Collision Rules in the drop-down box to specify the course of action.
- Increment by a number: Use this option to add an incrementing number to your files/ folders whenever there is another file with the same name in the destination directory. This is the safest option to preserve both file versions and avoid potential data loss.
- Replace: Use this option to overwrite files from the destination directory with those in the source directory. The program will overwrite any files without user confirmation.
Other Features:
- Batch rename multiple files/ folders with a few clicks
- Dozens of file renaming rules to choose from: new name, remove text, replace text, trim text, prefix, suffix, numbering, swap, insert at, lower case, upper case, title case, etc.
- In-house file previews
- Automatically rename files on popular cloud storage platforms (Dropbox, Google Drive, OneDrive, and Amazon S3) without downloading your files. It saves your time and Internet bandwidth.
- Organizer: Automatically organize your files in an orderly folder structure based on their dates.
- Music Fixer: Fix music files with incomplete music tags.
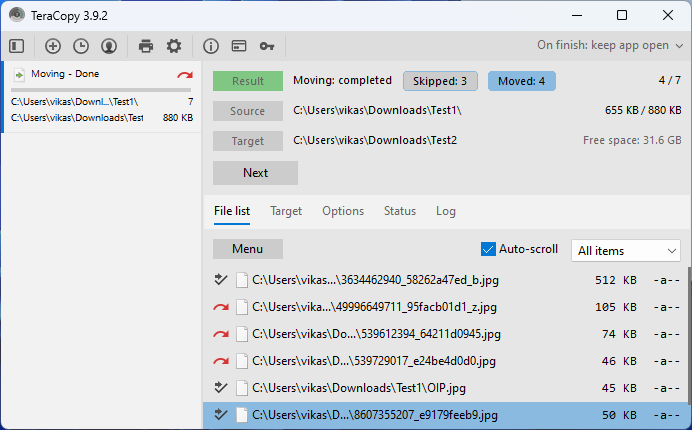
Method 3. Using TeraCopy
TeraCopy users have an edge over those using the standard File Move function in Windows. While the latter restricts you to only fewer options, the former provides plenty of options. Besides, TeraCopy is free.
What is TeraCopy?
TeraCopy is a freeware tool primarily designed to simplify moving and copying files. It provides various features to batch perform file activities, save a custom list of files/ folders to move or copy, and then reload them later. Such features can be very handy for repetitive tasks and save time.
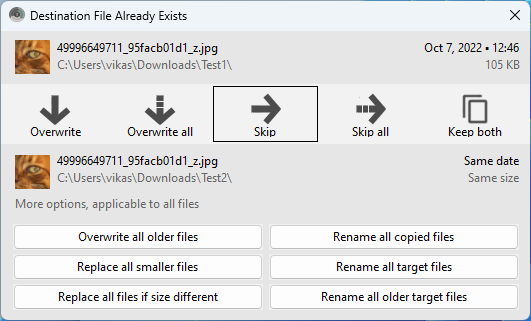
Overwriting Options in TeraCopy
- Overwrite: When you select this option, TeraCopy will replace the file displayed on your screen from the destination folder with the file from the source folder. Select it only if you don’t mind losing the concerned file from the destination directory.
- Overwrite all: If both the source and destination folders contain some files with the similar names, TeraCopy will replace all files from the destination folder with the corresponding files from the source folder. Do not use this option if you want to keep files from the destination directory.
- Skip: Use this option to skip moving files with the same name. Your original file will not be replaced.
- Skip All: Use this option to skip moving all files with the same name. Your files in the destination folder will not be overwritten.
- Keep Both: Choose this option to keep both the versions of your files. TeraCopy will move the files from the source directory and rename them with incremental numbers. Although this is the safest option, it can cause unintended duplication.
More Options:
- Overwrite all older files: Use this option if you want to replace the older versions of your files with the corresponding newer versions. If the destination directory already contains a newer version, no action will be taken.
- Replace all smaller files: Use this option to keep larger files and replace smaller with the larger ones. If the destination directory already contains larger files, no action will be taken.
- Replace all files if sizes are different: Use this option if you want to replace files only if their sizes differ. If the file sizes are the same, no action will be taken.
- Rename all copied files: Use this option to rename all the copied files from the source directory after copying them to the target directory.
- Rename all target files: When selected, this option renames the files in your target directory rather than the source directory.
- Rename all older target files: Use this option to rename only those files in the target directory that are older compared to files in the source directory.
Bonus Tip: Recovering an Accidentally Overwritten File
While moving your files, a possibility is that you might accidentally select the option to overwrite your files. Although there is no guarantee that you can recover all your files, here are some steps worth trying:
- Right-click on an accidentally overwritten file.
- Choose Properties.
- Click Previous Versions.
- Select an earlier version of that file you want to restore.
- Click OK.
Important:
Previous Versions feature in Windows will only work in limited scenarios. In order for this feature to work it is important that the System Restore feature is turned on and configured to create new restore points regularly where your file is stored. Or, you must be using the Windows Backup service to automatically backup your files.