Even though file renaming is a simple task, it may cause some unexpected errors. Your computer may display one of the following errors and the renaming process would fail. In this article, we’ll discuss different scenarios, common error messages and their resolutions.
Rename Files in Bulk Using Easy File Renamer. Apply 10+ Renaming Rules. Also Rename files on Cloud. Download NOW!
Scenario 1:
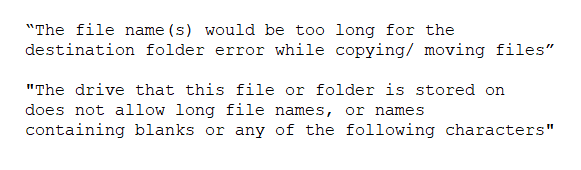
This above error occurs when your filenames are too long. You may want to trim some part of your filenames to fix this error.
Let us imagine you’ve a massive music library with hundreds of files. Some of your file names start with a common text (say, Alan Walker album songs –), followed by the actual music title. How do you get rid of the repetitive common text? Read on to find how.
Method 1: Using PowerShell
You can use Windows PowerShell, a command-line based tool in Windows, to shorten your file names. Keep in mind, PowerShell is a complex tool that requires experience with different Windows commands and scripts. Writing incorrect commands could result in data loss or unexpected changes to your computer’s system. Re-read and verify your command once before executing it.
- Open Windows PowerShell. To open PowerShell, press Windows Key + X simultaneously and select Windows PowerShell (Admin). Alternatively, you can type PowerShell in the Search Box on your Taskbar and open Windows PowerShell from the search results.
- To trim long filenames for specific file types (say, .docx), run the following command:
- get-childitem *.docx | foreach { rename-item $_ $_.Name.Replace(“Alan Walker album songs –“, “”) }
- To trim long filenames irrespective of their types, run the below script:
- get-childitem *.* | foreach { rename-item $_ $_.Name.Replace(“Alan Walker album songs –“, “”) }
Method 2: Using Easy File Renamer (Recommended)
Easy File Renamer is a file renaming tool for Windows. It supports batch file renaming with plenty of file naming patterns. For example, you can shorten the file names by using the Trim rule. You can add text to your existing file names, remove specific characters or replace them with another character, add numbering, and do much more. In contrast to PowerShell, there is no need to worry about data loss or harming your system. You don’t need to be a tech-savvy individual to use Easy File Renamer. EFR has a user-friendly appearance and it provides some other add-on functionality to batch move/ copy files without errors.
- Download Easy File Renamer and install it on your computer.
- Click on Add Files and select the files you want to rename.
- Select your desired renaming rule from the left-hand side panel. For example, to shorten your file names, select the “Trim text” option and specify a length in number. To trim first/ last 10 characters, type 10 and choose whether to trim from the beginning or end of the name.
- Click on Add Rule.
- Keep in mind that you can add multiple rules if you want.
- Once you’re done, click on Add Rule to proceed.
Scenario 2:

Your file cannot be renamed until it has been closed by the program using it. You’ll need to identify which program or background process is using your file and terminate that program/ process. In some cases, you will get this error when the drive containing your file is read-only, especially if you’re trying to rename files on a Network Drive or a CD-ROM. It may also be possible that you don’t have sufficient privileges to write to the folder as it is owned by another user on your computer. Let us go through each of these possibilities.
Method 1: Release the Locked File
Check to see if your file is locked for editing. You can do so using a freeware tool from the tech-giant, Process Explorer. Here’s how:
Find out which Executable Application (.exe) is using your file:
- Download Microsoft Process Explorer.
- Extract the downloaded .zip file contents to a temporary folder (say, Desktop\SysInternals)
- Right-click the Process Explorer file, and select Run as Administrator.
- Click on the Gunsight icon.
- Drag it over the file or folder that you are unable to rename.
- Process Explorer will highlight the corresponding program.
Find out which Dynamic Link Library (.ddl) file is using your file:
- Download Microsoft Process Explorer and run it as Administrator. (Follow Steps # 1-3 above)
- Click on the File menu, select Find a handle or DLL. Or press the keyboard shortcut: Ctrl + F
- Type name of the locked file that fails to rename. (You do not need to enter a full file name. Partial file names also work)
- Click on Search.
- Process Explorer will display a list of all corresponding files.
Release a Locked File:
- Select an application or process locking your file.
- Press the Delete key of your keyboard.
Method 2: Request Network Drive Owner for File Writing Privileges
If you’re trying to rename a file stored on a Network Drive or Web Drive with only read-only privileges, please contact your host server administrator to provide the appropriate privileges.
In the case you’re trying to rename a file stored on a read-only CD-ROM or DVD-ROM, there is no way. You may consider buying a Rewritable DVD instead.
Method 3: Remove Write Protection from the Drive
If your drive is write-protected by another user on the same computer, you may want to contact them to provide file writing privileges. You may also sign in from the Administrator account to perform the operation.
If you’re the sole administrator of your PC, format the drive after taking a backup of all the drive contents.
Formatting a Drive:
Warning: Formatting will wipe out entire data on the selected partition, so be sure to backup everything to an External Hard Drive or on to another partition on the same hard disk.
- To format your drive, type Disk Management in the Search Box on your Taskbar.
- Open Create and Format Hard Disk Partitions.
- Right-click a drive you want to format, and select Format.
- Follow the on-screen instructions.