Whether you’re on a bus ride to college or you’re working out, music can be your best friend. While music often speaks to the soul, album art is a visual treat correlating to the songs, especially if you are a die-hard fan of the artist and aesthetics in general.
Have you ever downloaded songs from the Internet but your download manager or phone messed up and mixed up all album art images? Or have you ever encountered a situation in which the album thumbnail was missing altogether? Imagine listening to Halsey’s Hopeless Fountain Kingdom and not being able to see the vibrant album art. Sounds boring!
Read through the article if you want to learn how to add thumbnails to MP3 files and make your playlist colorful!
Adding Thumbnails via Windows Media Player
You need to be using a stable internet connection to be able to add album art thumbnails by using this method.
- Launch Windows Media Player and import MP3 files.
- Look for Music on the left sidebar and then click it so that it collapses. Now select Albums.
- Right-click an album without a thumbnail and select Update album info. Windows Media Player will then launch the update process instantly.
- If you wish to dd a thumbnail manually, select the Find album info option instead.
- Now a new window will pop up through which you can easily update the relevant missing data.
Adding Thumbnails via Easy File Renamer
While the above-mentioned method is a bit tricky and has some limitations, Easy File Renamer allows users to easily update thumbnails of each and every MP3 file. Here’s how you could do it too:
- Download Easy File Renamer from its website and execute its setup file to install it.
- Once the program launches, head to the Music Fixer tab.

- Now click the MP3 Files button in Step 1.
- Select the files from your computer and click Open.
- Now click the Bulk Tag Editor button.
- A new window will now open up in which you can easily click the Add button to add up album art.
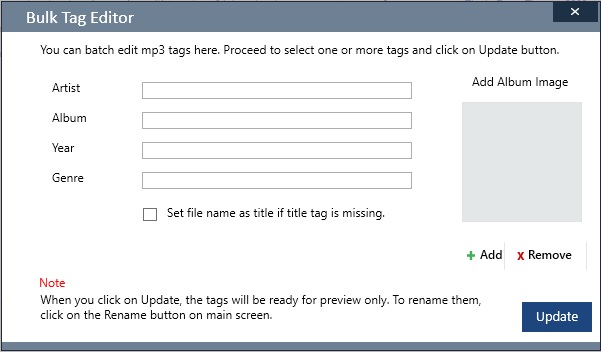
Editing tags in bulk - Click Update once you’re done.
- Finally, click Rename to make the final changes.
You can also use this feature to add thumbnails to multiple music tracks at once.
As a music lover, not having thumbnails is not the only problem one can face. Imagine trying to find a specific song but not being able to because your downloads were automatically titled with weird numbers and names of websites instead of the actual song titles. Or maybe you want to arrange all the MP3 files in a specific order but their names keep confusing you. Well, now we have a way to fix this problem too!
Renaming Files with Easy File Renamer
If you start to rename each file individually, it will take ages and at one point or another, you will eventually get frustrated and drop the idea altogether. To fix this issue in a fast and efficient way, Easy File Renamer rises to the occasion to rename files individually as well as in bulk.
- Open the program and go to the Music Fixer tab.
- Click the MP3 Files button, and now you can easily select and load files into the EFR interface.
- On the left-hand side, you will see the Select Rule drop-down menu.
- Choose a rule that suits your needs. You can opt to apply a single rule, multiple rules, and also multiple instances of a single rule or multiple rules all in a go.
- Depending on the rule you have selected, you might have to enter text in the textbox as well as choose from the several radio boxes that are available.
- Click the Add Rule button to apply all the rule(s) in the present shape. The Item New Name column will be showing a preview of the item name after the changes have been applied.
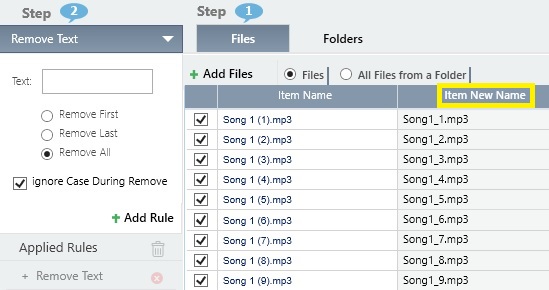
Previewing the new names - Finally, click the Rename button located at the bottom right corner of the interface.
- Click Yes in the prompt to launch the rename process.